Water is an incredibly important part of long distance backpacking to make sure you stay hydrated and healthy. Unfortunately, water is heavy so minimizing the amount you carry is always helpful as long as you can access enough of it along the trail. To figure out how much to carry you need know; how much you drink, how easy it is for you to filter water, and how frequent water sources are.
How much water do you drink in a day of backpacking? Roslyn and I have figured out that we use 5 to 6 litres of water each per day if its about 20C out and we are doing moderate hiking. 6 litres of water weighs just over 13 lbs, which us about half of the 'safe' weight maximum of 30 lbs we try to stay at. If we are doing strenuous hiking or the temperature is higher we pretty quickly hit 9 to 10 litres of water each. 10 litres of water comes in at 22 lbs, which is just a back breaking amount to add on top of everything else if you are trying to cover 20 km.
I also want to point out that a large portion of the water is used in the morning when we wake up, and at night for supper and before bed. We use about 2 litres of water at camp per day, so on a moderate hiking day only 3 litres is used on trail.
Now that we know how much we need in a moderate day (5 litres), how easy is it for us to get that water filtered? Roslyn and I use the Sawyer Mini, which is a very simple and quick filtering system. We can filter about 3 litres of water in 10 to 15 minutes if we get to a water source. Other systems like gravity feed systems or tablets required more time or at least more care to make sure you don't run out of water before having more ready to go.
With our setup, we can filter quickly and easily so down time is not a large issue. If you are using a water purification method that takes longer though you might want to consider timing water filtration with larger breaks (lunch or another 30+ minutes break) in order to minimize unnecessary downtime. Unfortunately, filtering less often means carrying more between filtering periods.
The last piece of information you need to figure out is how frequent water sources are on the trail. Whatever source of navigation you are using should have water sources on it, and you can then figure out what the distances between all of them are. Roslyn and I try to make sure we have enough water to travel between 2 to 4 water sources with out refilling and then aim to refill at source number 2 or 3 depending on how they are looking and how much we are drinking. This means that we are likely to get to a source before running out even if our first planned stop is dry.
Now to bring it all together with an example. For a moderate day of hiking we each need 5 litres of water to cover about 20 km, 3 litres while hiking and 2 litres at camp. With these numbers we are drinking about 0.15 litres per km. If the water sources are spaced every 3 to 4 km then we can easily carry 2 litres of water each to get about 10 to 13 km with out needing to refill and have plenty of opportunities to do so before running out.
If its a hot day on strenuous terrain and we need 10 litres of water (2 litres at camp and 8 litre while hiking), for a 20 km day we are drinking about 0.4 litres per km. On 2 litres of water we can get about 5 km. If water sources are still every 3 to 4 km we need to carry at least 3 litres cover two water sources in case the first one is dry. To easily cover 10 to 13 km without worries like in the first example we would need a bit over 5 litres. That's a difference of about 7 lbs of water, and something we would like to avoid. In this situation, instead of taking enough to get 10 to 13 km we would only bring about 3 litres each so we can get to two water sources and then plan on filling up at every water source.
The second example shows how quickly you can go from 2 litres is okay and only needing to refill once or twice in a day, to 2 litres gets us to the next water source I hope its not dry. Making sure to plan out your water is one of the most important parts of a backpacking trip to make sure you don't injure yourself, especially in hot and strenuous conditions.
Tuesday, April 28, 2020

Wednesday, April 22, 2020
Pre-Season Preparations, Part 1
As the backpacking season fast approaches, Roslyn and I have identified some ways to improve our backpacking trips. We want to improve our distance, reduce injury and fatigue, and become more efficient in what we do around camp.
The first thing to do is get back into shape for the backpacking season. We have slowly been adding more winter activities to remain in shape, but hauling a backpack up and down hills for 10+ hours a day puts a lot of stress on your feet an knees. Proper conditioning is one of the things we have decided to focus on to help reduce injury and fatigue issues.
Our plan has 3 main parts to it, each helping build towards a goal of doing repeated 20 km days with minimal soreness at the end.
Part 1 - Frequent Use
Part one of our plan is to get frequent use out of our feet and knees. We have been doing this by heading out for about 30 to 60 minutes every day after work in the city. We have been making sure to keep the pace fairly high and to do about 2 to 4 km every day. Since pretty much all the walking in the city is on pavement/concrete this has been helping keep our bodies in a lightly used state.
Part 2 - A Weekly Push
Once per week we have been going out for a longer walk in the 8 to 12 km range.Our goal for these has been to keep a brisk 5 to 6 km per hour pace up the entire time. We've managed to get out for the last three weeks now early on a Sunday, which has been nice. Our plan is to keep these up and potentially push out to a 15 km in 3 to 3.5 hours by the end of the summer. Since this is without any weight and usually on fairly easy trail its a good work out and helps with some of the cardio side of things.
Part 3 - Sprints!
Now that the snow and ice are gone (for the most part) we are going to add intervals into three of our daily walking trips. To start we are going to do a 10 to 15 second sprint every two minutes. This will help get our cardio and heart rate up, but also help by putting more force onto our feet and joints during the sprint. The extra load will help with conditioning over time.
That's our current plan to get back into shape for the backpacking season. Our main concerns are avoiding any injuries on the way there, as repeated stress injuries are fairly common when hiking/backpacking with lots of weight for long periods of time. Slowly conditioning ourselves back into shape should both help reduce the chance of injury and help us go further.
Tuesday, April 14, 2020
Simply Stuff - The Big Three
Every backpacker must bring a shelter, sleeping system, and backpack on a backpacking trip. These three items are commonly referred to as the 'Big Three', and they can make or break a hiking trip depending on how well they perform. The Big Three come in as the three most important items for comfort, weight, and cost as need to be chosen with all of that in mind.
While I will talk about the weight aspect in the Carry Your Weight series, here is what each of the Big Three need to accomplish to meet your goals when out backpacking, and a couple different methods of meeting those goals.
Shelter
Your shelter needs to keep you dry, out of the wind, and help keep you warm at night. Storing all of your gear is a nice bonus, but a lot of your stuff will be kept outside; food should be in an appropriate storage location, footwear/wet gear/trekking poles should remain outside, and you likely won't actually have much else.
There are a couple different ways to provide yourself with shelter on the trail. The most popular is a tent. Tent's allow for fairly easy setup anywhere and provide the largest amount of protection from the elements for yourself and your gear. Next are hammocks. Many people prefer hammocks over tents as they sleep better in them, though they are more limited since you need trees. Third are bivy sacks. Bivy sacks are essentially a coffin shaped tent that you can slide a sleeping bag into. The last two common shelter setups are tarps and cowboy camping. Tarping is just like it sounds, you just make a canopy from a tarp to sleep under, though the lack of a bottom means location is important to keep the water out. Cowboy camping is going without a shelter, simply sleeping in your sleeping bag under the stars.
There are a lot of trade offs between each of the above shelter systems. Roslyn and I have chosen to use a tent because we plan on going to a large variety of terrain and weather types, and a tent makes us feel most comfortable with our shelter setup. We are currently using the Marmot Tungsten UL 2P tent for backpacking trips, which is just over 3 lbs for two people.
Sleeping System
The sleeping systems goal is keep you comfortable while you sleep. Depending on conditions you might need different gear for different temperatures or different shelters. The basic sleeping system setup is a sleeping bag with a sleeping pad. Sleeping pads come in a couple different varieties, closed cell foam, self-inflating foam, or air inflated, each with it's own pros and cons. There are also a large variety of sleeping bags with down vs synthetic being the main choice to make. Down quilts are also a popular choice and are usually a bit lighter than sleeping bags.
Roslyn and I are currently using inflatable air pads with sleeping bags as our sleep system. the sleeping bags are usable down to around -5C, but it's not the most comfortable night ever.
Backpack
The backpacks goal is to keep all your stuff together and comfortably supported on your back while hiking.There are a lot of different ways backpacks do this. The main choices come down to internal vs external frame, roll down vs non-roll down top, uses a brain vs does not use a brain, size of the bag, the number of extra pockets and straps, and the material. I think that choosing a backpack is harder than choosing a shelter or sleeping system because of all the little details that can help or hinder your trip.
Right now Roslyn and I each have 3 backpacks for different types of trips. I have a small 18L pack for day hiking, a 30L pack for warm weather trips in the 3-4 days length, and a 55L backpack for trips that are either 5+ days long or where I need to bring extra clothing or rain gear. Roslyn has a 28L pack for day hikes, a 33L pack for 3-4 day warm weather trips, and a 65L pack for longer excursions. Both of us want to try out some backpacks in the 40L to 45L range as the 55/65L packs are a bit large for us at the moment and we would like to cut some weight.
I'll have some more posts up about each of these eventually, but if you have any specific questions about the Big Three let me know.
Wednesday, April 8, 2020
Carry Your Weight - Food, Glorious Food!
After your base weight, food, water, and fuel make up the rest of the weight in your pack. Food weight is likely to be the heaviest of the three, at least for the first day or two out. Properly managing food weight will help the most out of the three consumables to keep your top pack weight to a minimum. However, you need to make sure you eat enough, otherwise you will fatigue too quickly and the day will be a lot harder.
The general rule of thumb used for food is 2 lbs of food per day. This includes all meals and snacks for the day. The trick is to pack as many calories as possible into that two pounds as you can, while still eating enough vitamins and minerals to remain healthy. And enough calories to fuel your body.
First up, here's two things to avoid while preparing meals for a backpacking trip.
1 - Avoid food with a lot of water in it. Water is dense at 2.2 lbs per litre, and has no nutritional value and zero calories. Fresh fruits, vegetables, and canned goods are heavy for what you get and should be avoided as the main part of your food supply. Roslyn and I bring some fresh food on day 1 when it will keep but after that everything should be as low water content as possible to keep weight down.
Leaving water out means using dehydrated or dried foods, and adding water to them on trail. This method works best if you can camp near water sources so that you don't need to carry water with you to make your meals at camp. If you do need to dry camp you can plan to have a supper that doesn't require water that night to minimize your water weight.
2 - Avoid eating just sugars. While candy, chocolate bars, and sweets can be low in water weight and high in calories they lack other nutrients and sugar is technically a toxin. Your body does not want to consume an all sugar diet, and even though you're getting a lot of calories you will not feel good or energetic. Sugar also acts as a minor diuretic due to your body trying to flush it out of your system, this means you will have to consume more water than normal to remain hydrated. Take some candy as a snack or morale booster, but don't make it your main source of food.
With those out of the way, here's some examples of what Roslyn and I typically bring for food.
Breakfasts
In a lot of cases we don’t bring breakfast. We find it slows us down and I don't lie eating in the morning. When we do bring breakfasts, they are usually 2 instant oatmeal packets each, or about 1/2 cup of dry oatmeal. We have also brought breakfast bars, and usually 2 of those is enough for breakfast.
Both oatmeal and breakfast bars tend to have a good blend of calories, vitamins, and sugar. They also don't have much water. The oatmeal will need to be either cooked with water or cold soaked, and most backpacking bars are pretty dry.
Lunch
Lunch on day 1 is almost always some cheese and 1/3 of a garlic sausage each (2/3 of a sausage is used). Lunch on day 2 and 3 is either beef jerky and cheese, maybe a bagel and cheese, or some bars and cheese. Cheese keeps well on trail for 2 to 3 days depending on temperature. The garlic sausage gets completely eaten day 1 between lunch and supper each trip because its heavy, but it's one of our luxury items.
Supper
For supper we either eat instant ramen noodles, instant mashed potatoes, or side kicks packages with dehydrated veggies flakes. On day 1 we treat ourselves and dice up the remaining 1/3 of the garlic sausage and throw it in too. We either eat 1 ramen or side kicks each or split 1 package of instant mashed potatoes. All of these meals need water added to them and are okay cold soaked if you don't want to bring any fuel (or if you forget it!).
Snacks
Since we generally skip breakfast and our meals are on the ‘light’ side, we usually bring at least 3 snacks per day each. We will have 2 cliff bars, 15 to 20 pieces of gummy candy, and some trail mix/nut mix/muchies mix each per day. We eat a cliff bar about an hour into the day, and then snack of the candy and trail mix as we go. If we are really hungry we eat the extra cliff bar at the end of the day.
Flavoring
To help make the food more interesting, we also bring some ways to flavour them. Spices packets and flavoured tuna packets work wonders on making 20 cent ramen packets taste amazing, and they are usually either inexpensive or easy to make yourself. We also try to bring either Mio or some water crystals to flavour our water occasionally as well as tea and hot chocolate powder for a nice evening drink.
So that's a break down of how plan our meals, with an eye on keeping weight down. We find that the 2 lbs of food per day rule of thumb is a pretty accurate metric to go by as long as you are taking low water weight foods. Unfortunately, this means that a 4 day trip adds 8 lbs of weight to your pack, putting Roslyn and I up to around 26 lbs, 18 lb base weight and 8 lbs of food. Once water and fuel are added in we start getting pretty close to the 30 lb limit we want to stay under.
Tuesday, March 31, 2020
Caddy Lake to North Cross Lake - June 2019
Date: June 15 and 16, 2019
Length: 34.3 km
Time: 6 hours, 43 minutes (Day 1), 2 hours 54 minutes (Day 2)

Caddy Lake to North Cross Lake
Caddy Lake to North Cross Lake is an iconic Whiteshell canoe route that passes through two tunnels under train lines on the way. From Caddy Lake Resort where we rented canoes to the north end of North Cross Lake is about 14 km if you take a fairly straight path like we did on Day 2.
On Day 1 we arrived at Caddy Lake Resort later than expected, and didn't get onto the water until about 10:30 am. Roslyn and I were in an aluminum rental, Tyler and Steve had rented an aluminum canoe, and Joel and Kyle were sharing Joel's parents fibreglass canoe.
About 3 km into the trip you get to the first cave. When you pass through one of the tunnels you need to blow a whistle and make sure there is no response before entering. This is to help prevent accidents and injuries due to the low ceiling and narrow walls.

First Tunnel Entrance

First Tunnel Exit
After the first tunnel, the route opens up again to South Cross Lake, which is a long narrow lake. About half way up the lake it becomes about the same as a slow moving river. The west side has a fair amount of overhanging bedrock cliffs, while the east side has a thin strip of march building into a dense pine forest.

The narrow end of South Cross Lake

The cutest flower on the water

Entrance to the Second Tunnel
The second tunnel passes from South Cross Lake into North Cross lake. Right at the exit of the second tunnel is a bit of a slalom. There four sets of poles that you needs to navigate between due to a lot of sharp rocks being in the water. This is likely more of an issue for motor boats, but we didn't feel like getting one of the aluminum canoes hung up on a sharp rock either.
After getting out of the second tunnel, we paddled on for another kilometer before breaking for lunch. We tied on at a campsite and pulled out our food and laid back enjoying the sun. We also watched about 6 or 7 groups cruise right by us, which turned out to be a bit of a mistake on our part.
After lunch we started looking for a campsite. As we came across them they were all full. We started getting worried and split up to each search one arm of the lake for a spot. Well, Roslyn and I did and Kyle and Joel did. Steve and Tyler had a very wide, very slow canoe so they stayed in a central location. After about 2 hours and another 5 km of canoeing up and down the lake, we stopped at a pretty crappy spot for another break. Not wanting to camp there, Roslyn, Joel and I jumped in the lightest canoe and took off to the end of the lake hoping to find a free spot.
It took us about 20 minutes, but we got to the end of the lake and took a look around. There was a pretty great campsite with a privy, as well a small dam to explore another couple hundred feet away. We went back and got everyone moving to the new site where we had a nice evening relaxing and fishing.

Near the bottom of the dam

Past the dam, more adventure awaits!

Very brave frog

Dragonfly close up
The next morning I woke up in time to catch the sun rising and spent some time just watching it come up. No one else was awake and the bay between our site and the dam was almost perfectly still and quiet. Definitely worth being up at 5:30 am to see something like that.

Phenomenal Sunrise
Once everyone started getting up, we had breakfast and packed up camp. We decided to try and get out as fast as possible to get back to Winnipeg for supper. With that goal in mind we managed to get back in only 3 hours of paddling with out any real breaks. Compared to the almost 7 hour trip in from the day before we were pretty happy. We also shaved 6 km off the route by knowing where we going.
All in all, this trip set us on another path of adventure. We now own our own canoe and are looking into completing some tandem moving water courses to get comfortable with canoeing through rapids.
If you want to see a video of this trip, check out out YouTube Channel here: Caddy Lake Canoe Trip - June 2019
Tuesday, March 24, 2020
Simply Stuff - Gear Regrets!
One of the fun parts about backpacking is getting to experiment with different types of gear and figure out what works for you. I, Connor, am a bit of a gear geek. Roslyn also appreciates trying out new gear and an optimized load out but doesn't like doing all the research.
If you're trying out different equipment, there's always a period where the new gear is the best gear. After the honeymoon period wears off you start to notice stuff that could be better, or that you miss about your old gear. Eventually, you'll know if the equipment is right for you or not. Unfortunately, a fair amount of gear ends up falling into the 'not for us' category or at least into the 'I'd like to keep looking' category.
Roslyn and I thought about all the gear we've used over the last two years and came up with two pieces of gear we wish we hadn't bought. Both of them are water filters, which made for a couple annoying trips.
1 - MSR Miniworks Water Filter
 The MSR Miniworks was the first water filter we used. It has a decent flow rate and a reusable ceramic filter that can be cleaned to provide a long term water filtration solution. From our experience, moderately dirty water caused the ceramic filter to foul after only 4-5 litres of water, and maintaining suction was difficult as the pump would start to cavitate if any air bubbles entered it from the hose. We used this water filter for only one trip before replacing it, and brought it as a back up on one other trip but never used it.
2 - Lifestraw

If you're trying out different equipment, there's always a period where the new gear is the best gear. After the honeymoon period wears off you start to notice stuff that could be better, or that you miss about your old gear. Eventually, you'll know if the equipment is right for you or not. Unfortunately, a fair amount of gear ends up falling into the 'not for us' category or at least into the 'I'd like to keep looking' category.
Roslyn and I thought about all the gear we've used over the last two years and came up with two pieces of gear we wish we hadn't bought. Both of them are water filters, which made for a couple annoying trips.
1 - MSR Miniworks Water Filter

2 - Lifestraw
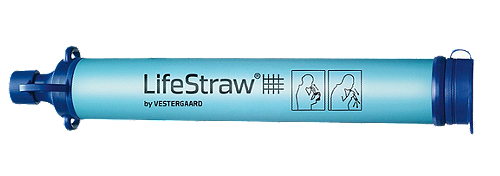
We bought the Lifestraw as a back up filtration system in case our primary filter broke. We've luckily never has to use it, but after the first summer we also stopped carrying it with us. For less weight and a smaller package, you can get water filtration tables to make water drinkable for you. The tablets will also fit in your first aid or odd's and end's containers instead of having to be another piece of gear to keep track of.
We wish we hadn't purchased the above gear, but having said that other people might like to use them. In the conditions they are meant for, both the MSR Miniworks and the Lifestraw work properly, we just found both of them limiting out backpacking experience.
Images obtained as screenshots from:
Tuesday, March 17, 2020
Carry Your Weight - Backpack Weight!
This is the first in a series of posts I plan on writing about weight! Backpack weight, food and water weight, maintaining body weight on trail. Weight is one of the main topics on every backpacker's mind and is related to pretty much every topic in the hobby.
The most commonly talked about is backpack weight. Backpack weight is the easiest to measure, easiest to change, and the target weight is as low as possible while remaining in budget and comfortable. Because of this you'll generally be able to find a lot of information about how to minimize pack weight.
The only real question surrounding backpack weight is: What is the correct weight?
The rule of thumb many people use is to have a 15 to 16 lb base weight. Base weight includes everything except for your worn set of clothing, water, fuel, and food. Once you've gotten the consumables put together, your pack ends up weighing about 30 to 35 lbs for a 5-6 day trip. This is about as light as most people are going to go without starting to spend a lot of money (though you can find decent light weight gear for a low cost if you look for it).
One problem with this rule of thumb is that it neglects different body sizes. Smaller people can not carry the same amount of weight without risking injury. One study (linked here) shows that you should not carry more than 20% of your body weight, or 30 lbs, which ever is lower. The 30 lb limit falls in line with the above rule of thumb, but only for people weighing 150 lbs or more.
Why does pack weight matter?
There are three main reasons pack weight matters: Fatigue, Energy Consumption, and Risk of Injury.
The heavier your pack is, the faster you will fatigue. Increased fatigue means you won't go as far in a day, you will have an increased risk of injury, and you won't recover as quickly during down time. All of these issues mean that you lower your chance of completing your hike on time and injury free.
Energy consumption is somewhat related to fatigue, but increased energy consumption is a problem all on its own. Backpacking long distances with weight requires a lot of energy and many long distance trips require 4000 to 6000 calories per day to keep up with energy needs. If your pack increases your energy consumption even more then you may have to carry more food. Which leads to a heavier pack and a slower speed. A slower speed potentially means more food is required, which again increases pack weight. From what I have read, a fair sized group of people lose a lot of weight and many people stop hiking due to malnutrition. Lower pack weights can help with this by reducing energy consumption.
Increased risk of injury is probably the most significant impact of a heavier pack. The more you carry, the more stress you put on your feet, ankles, and shins. These parts of your body are prone to repeated stress injuries, and lower weights help to reduce the risk. You are also better able to control you body with a lighter backpack, mitigating the potential of tripping or reducing the severity of a fall when it does happen.
Our Pack Weight Journey
Roslyn and I started out with about 40 to 45 lbs of gear each on our first hike. By the end of it our feet were painful to walk on and we decided to start losing pack weight. Over two years we have succeeded in getting down to an 18 lb base weight or about 30 lbs for a 4 day trip. Over the next year we plan on trimming small amounts of weight from items until we can hit about a 15 lb base weight. This is both our comfort zone for pack weight and we get to keep some extra items we'd rather not go without.
If you struggle or have struggled with pack weight, or want advice on how to lower it, drop us a comment and let us know about it!
Subscribe to:
Posts (Atom)